Stop Your Leaky Roof from Being a Drip on Your Day: A Step-by-Step Guide
Few things can disrupt the comfort of your home quite like a leaky roof. That persistent drip not only threatens water damage but also poses an immediate problem that needs fixing. Let's walk through the steps to patch up that leak and prevent future issues.
Identifying the Leak
The first task is to locate where the roof is leaking. Water can travel down beams, making the source of the leak appear in a different spot from where the water penetrates. Here's what you need to do:
- Check Attic or Crawlspace: Look for damp spots, mold, or water stains.
- Inspect Roof Surface: From a safe vantage point, check for damaged shingles, broken flashing, or pooled water.
- Simulate Rain: Use a garden hose to mimic rain while someone inside the attic identifies the problematic spot.
Gathering Materials
Once you’ve located the leak, you'll need the right tools and materials to fix it:
- Roofing cement or sealant
- Roofing nails
- Scraper
- Replacement shingles or tiles
- Ladder and safety gear
Quick Fixes to Longer-Term Solutions
Temporary Repairs are the quickest way to stop further damage:
- Apply Roofing Cement: Smear over and around the leak spot using a scraper.
- Tarps and Plastic Sheeting: For immediate protection, affix waterproof tarps securely to cover large areas.
Permanent Solutions require more time but offer long-term peace of mind:
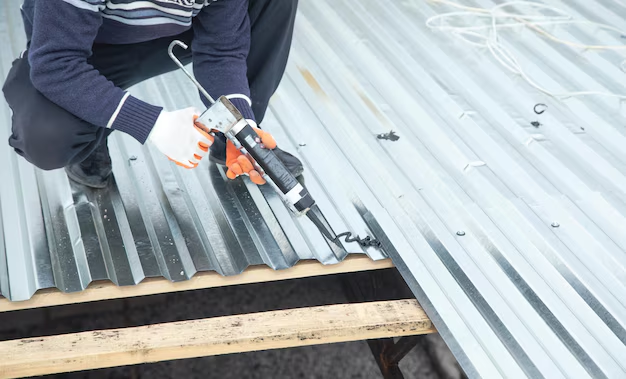
- Replace Damaged Shingles or Tiles: Remove the old pieces and nail down new ones.
- Fix Flashing: Replace loose or cracked flashing with new pieces to seal intersections and seams in the roof.
- Gutters Matter: Ensure gutters are clean and water can flow freely away from the roofline.
Preventing Future Leaks
Prevention is always better than remedy. Consider these tips:
- Regular roof inspections, at least twice a year.
- Prune tree branches that hang over the roof.
- Enhance attic insulation and ventilation to prevent ice dams.
When to Seek Professional Help
While many homeowners can handle small leaks, professional intervention is wise for extensive damage or challenging issues. Seasoned roofing contractors have the expertise and safety equipment to deal with significant or hazardous problems.
Expanding Your Fix: Navigating Financial Repairs
Handling a leak can be just the tip of a larger iceberg of home maintenance issues. Fortunately, there are programs and resources to ease the financial burden. Whether you’re tackling a roof that’s seen better days or other pressing expenses, consider these options:
- Home Repair Loans and Grants: Check for government aid, especially for rural areas or lower-income households.
- FHA 203(k) Loans: A valuable option for federally-backed help with home repairs.
- Weatherization Assistance Programs (WAP): They can make your home more energy-efficient and sometimes contribute toward necessary repairs.
- Insurance Claims: If the leak is due to recent storms, check with your insurance if it's covered.
- Educational Grants for Energy Efficiency: Some programs offer grants to homeowners making their homes more eco-friendly, including roof repairs.
🌟 Financial Aid and Assistance Resources
- 🏡 Home Repair Loans and Grants: Local and federal programs to assist with repairs.
- 💵 FHA 203(k) Loans: For comprehensive renovations.
- 🌧️ Weatherization Assistance Programs: Energy efficiency and repair help.
- 🛠️ Insurance Claims: Coverage check for damage repairs.
- 🎓 Educational Grants: For eco-friendly and energy-efficient home upgrades.
Taking care of a leaky roof today can save you from future headaches and wallet woes. Whether you’re wielding a hammer or seeking financial help, you’re not alone in your quest for a dry and comfortable home.
Discover More
- Common Electrical Problems And How To Fix Them
- Common Plumbing Issues And How To Fix Them
- DIY Home Repairs Every Homeowner Should Know
- Home Maintenance Tips For First-Time Homeowners
- Home Maintenance Tips For Older Homes
- How To Avoid DIY Home Repair Disasters
- How To Clean And Maintain Your Home's Windows
- How To Extend The Life Of Your Home Appliances
- How To Identify Structural Problems In Your Home
- How To Keep Your Gutters Clean And Functioning