Mastering Roof Flashing: Essential Steps for a Secure Home
Installing roof flashing is a critical task in maintaining the structural integrity of your home. It prevents water from seeping into your roof and causing damage. Whether you are a DIY enthusiast or someone looking to save on contractor fees, understanding how to put flashing on a roof can make a significant difference.
What is Roof Flashing?
Roof flashing is a thin material, usually made of galvanized steel, aluminum, or copper, installed to direct water away from roof areas where it might collect. These areas include chimneys, vents, and skylights, where the roof meets a vertical surface—ensuring moisture doesn’t infiltrate your home.
Essential Tools and Materials
Before starting, it's crucial to gather all necessary tools and materials. Here’s what you’ll need:
- Flashing material (galvanized steel, aluminum, or copper)
- Roofing nails or screws
- Hammer or screwdriver
- Tin snips (for cutting the flashing to size)
- Roofing cement or adhesive
- Measuring tape
- Caulking gun and sealant
Step-by-Step Guide to Installing Roof Flashing
1. Prepare the Area
Before installing, make sure the area is clean and dry. This ensures the flashing will adhere properly and provide an effective seal.
2. Measure and Cut the Flashing
Using a measuring tape, determine the length of flashing needed. With tin snips, carefully cut the flashing to fit the measured areas. Accurate cutting is crucial to avoid leaks.
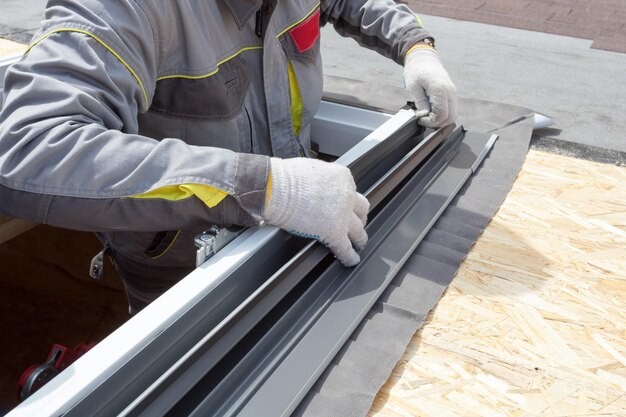
3. Position the Flashing
Place the flashing under the existing shingles. Ensure it's properly aligned along the roof's contours and around any protrusions, like chimneys or vents.
4. Secure the Flashing
Using roofing nails or screws, secure the flashing in place. Begin from the bottom of the roof and work your way up. Nail the flashing at the top edge and at intervals to prevent movement due to wind or other factors.
5. Seal the Edges
Apply roofing cement along the edges of the flashing using a caulking gun to prevent water from seeping beneath the flashing. Sealant is crucial around chimneys and vent areas where water intrusion is most likely.
6. Inspect and Adjust
Once installed, inspect the flashing to ensure there are no gaps or misalignments. Adjust as necessary to maintain a tight seal.
Expanding to Other Areas of Interest
While roof maintenance is a critical aspect of homeownership, it’s just one piece of the puzzle. Sometimes, the financial burden of maintenance can be overwhelming, and understanding available financial resources can ease the strain.
Financial Resources for Homeowners
If you're tackling roof repairs or other significant home projects, consider these financial assistance options:
- 🏡 Government Aid Programs: Check local and federal programs that offer grants or loans for home repairs.
- 💳 Credit Card Solutions: Some credit cards offer 0% APR on purchases or balance transfers that may help manage costs.
- 📚 Educational Grants: Enroll in courses or workshops that teach home renovation skills, potentially saving you on labor costs.
- 💰 Debt Relief Options: Programs are available to consolidate and reduce your debts, freeing up cash for home improvement projects.
Navigating home maintenance and considering financial assistance options can seem daunting, but armed with the right information, your path can be clear and manageable. Whether you're securing your roof or securing your financial future, the right tools and knowledge make all the difference.