Ready to Power Your Home with Solar Panels? Here's Your Guide to Rooftop Installation
Harnessing solar energy can not only reduce your electricity bills but also contributes to a greener planet. Installing solar panels on your roof is a fantastic way to embrace renewable energy, but where do you start? Here’s a step-by-step guide to ensure your solar panel installation is smooth and successful.
Assessing Your Roof’s Suitability
Before diving into installation, determine if your roof can support solar panels:
- Sunlight Exposure: Ensure your roof gets sufficient direct sunlight, ideally facing south in the Northern Hemisphere.
- Structural Support: Confirm that your roof structure can bear the weight of solar panels.
- Age and Condition: It may be worth replacing an aging roof before installation to avoid future complications.
Designing the Solar Power System
Once your roof is deemed suitable, consider the following:
- Energy Needs: Calculate your home's energy consumption to determine the number and type of panels you need.
- System Efficiency: Choose panels based on efficiency rates, warranties, and price to optimize your investment.
Permits and Regulations
You must comply with local zoning laws and obtain necessary permits before installing:
- Building Permits: Required to authorize modifications to your home.
- Utility Approval: Notify your energy supplier about your intent to connect solar panels to the grid.
Hiring Professionals or DIY?
While DIY solar installation kits exist, hiring professionals ensures safety and compliance:
- Professional Installers: They provide expertise and often offer warranties on the installation.
- DIY Kits: Best for those with technical skills, offering a more hands-on approach and potential cost savings.
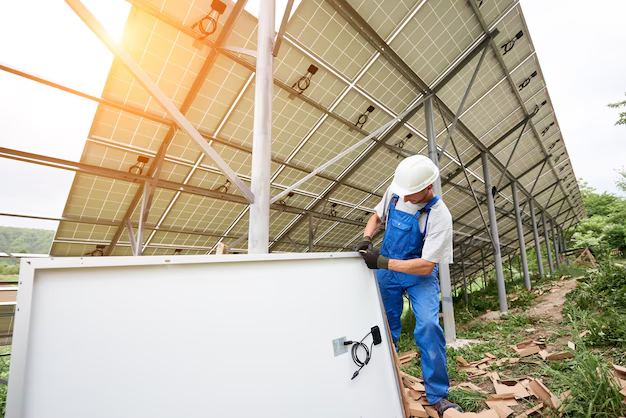
The Installation Process
Here’s a general overview of what to expect during installation:
- Mount Installation: Firmly secure the mount based on your roof’s specifications.
- Panel Placement: Adjust solar panels onto the mounts, angling them for optimal sunlight absorption.
- Wiring the System: Connect panels to the electrical grid, ensuring all connections are sealed and waterproof.
- Inverter Connection: Attach an inverter to convert solar energy into usable electricity for your home.
- System Testing: Upon completion, run tests to ensure everything is functioning correctly.
Maximizing Your Investment
Once installed, there are financial incentives to enhance your solar investments:
Government Incentives: Many governments offer tax credits, rebates, or grants to offset installation costs.
Net Metering: This allows you to sell excess energy back to the grid, potentially earning you a profit.
Integrating solar solutions is not just about environmental stewardship but also financial prudence. Understanding the available financial assistance options can ease the upfront investment.
Exploring Financial Aid and Support
Embarking on a solar installation project can be financially intensive, but several programs can help:
☀️ Solar Investment Tax Credit (ITC):
- Federal tax credit for a portion of solar installation costs.
🌞 State Tax Rebates:
- Additional incentives that vary by state, providing further reductions on expenses.
🌟 PACE Financing:
- Property Assessed Clean Energy offers loans repaid through property taxes, often with favorable terms.
💡 Energy Efficiency Loans:
- Loans from utility companies or financial institutions to support energy efficiency projects.
📚 Educational Grants:
- Offers that promote renewable energy education and practices at community levels.
Harnessing solar energy is a powerful move towards sustainability and savings. With growing support from governments and various financial programs, solar panels on your roof can be more accessible than you think. Don’t just power your home; empower your future.