Master the Art of Installing Drip Edge on Your Roof
When it comes to protecting your home from water damage, installing a drip edge on your roof is a small yet significant upgrade that many homeowners overlook. This metal flashing, installed at the edges of the roof, prevents water from seeping underneath the shingles, thereby safeguarding the fascia and reducing the risk of moisture-related issues. If you're planning a roofing project, knowing how to install a drip edge correctly can save you time, money, and future headaches.
What You'll Need:
- Drip edge flashing
- Hammer
- Roofing nails
- Tape measure
- Snips or tin snips
- Ladder
- Safety gear (gloves, safety glasses)
Step-by-Step Guide to Installing Drip Edge
Measure and Cut the Drip Edge
Begin by measuring the length of the roof edges where you will be installing the drip edge. Cut the drip edge pieces to length using snips, ensuring overlaps where necessary, generally around 2 inches at joints and corners.
Secure the First Piece
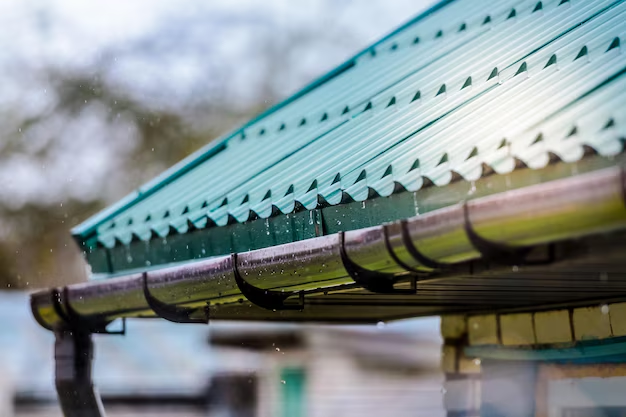
Starting at a corner of the roof, place the drip edge along the eaves, ensuring it extends slightly beyond the fascia board. Nail the drip edge into place with roofing nails spaced around 12 inches apart. The aim is to have a snug fit that directs water efficiently into the gutters.
Work Upwards Along the Rake
Once the eaves are completed, move on to the rake edge of the roof. The installation is similar but requires careful attention to how the drip edge overlaps at each corner. Firmly secure each piece, keeping nail spacing consistent.
Handling Corners and Valleys
For any corners or valleys, overlap the edges while ensuring that nail heads are fully flushed to avoid potential water paths. Seal any gaps with roofing cement for an extra layer of protection.
Inspect and Adjust
After installation, inspect all sections for alignment and proper overlap. Adjust as needed to ensure that there are no gaps or problematic angles that could direct water beneath the roofing material.
Properly installed drip edges are a preventive measure that can extend the life of your roof, but sometimes even the most diligent homeowner encounters financial constraints that make home improvements daunting. Fortunately, numerous financial assistance programs are available to support such home maintenance endeavors.
Exploring Financial Assistance Options
For those with limited resources, several programs can provide financial relief or low-interest rate loans to help fund essential home repairs:
- 🛠️ Home Improvement Grants: Check with local government offices for grants that support home maintenance for low-income households.
- 🏠 Weatherization Assistance Program (WAP): A federal initiative aimed at helping families improve their home’s energy efficiency, which can include roofing enhancements.
- 💳 Low-Interest Credit Options: Many banks offer credit solutions tailored for home repairs. Compare options to find a rate that fits your budget.
- 📚 Educational Grants for Skilled Trades: Some organizations offer funding for training in roofing and other home improvement skills, allowing you to tackle future projects with confidence.
For homeowners looking to undertake roof maintenance projects, knowing about these resources can make a significant difference. Besides improving your immediate living conditions, each upgrade adds value to your property. Who knew that a task as simple as installing a drip edge could open the door to such creative financing and educational opportunities?