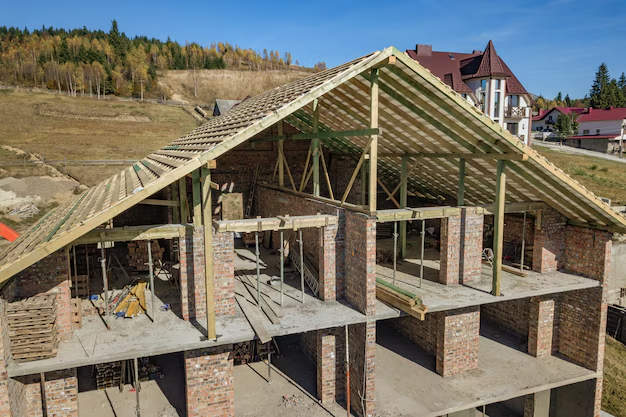
Mastering the Art of Roof Framing: A Guide for Beginners
Framing a roof can seem like a daunting task, but with a bit of guidance, even newcomers to the home improvement world can achieve successful results. This process is essential to a solidly constructed building, providing the skeleton on which the roof's covering will rest. The key lies in understanding the essential steps and having the right tools on hand.
Understanding Roof Types
Before starting, it's important to grasp the different types of roofs you may be framing, as the method can vary greatly. Common types include gable, hip, and flat roofs. Each comes with its own set of construction techniques and challenges:
- Gable Roofs: Recognizable by their triangular shape, these roofs are straightforward to frame, making them a popular choice for beginners.
- Hip Roofs: Featuring slopes on all sides, they offer excellent stability but require more complex rafters.
- Flat Roofs: Though called 'flat,' they still require a slight pitch for water drainage and often involve simpler framing.
Essential Tools and Materials
Having the right tools and materials is crucial:
- Roofing square: For accurate measurement and angles.
- Circular saw: A power tool for cutting wood.
- Hammer and nails: Basic tools for fastening.
- Level: Ensures accuracy in construction.
Step-by-Step Roof Framing
Design and Measure: Begin by designing your roof and calculating the pitch. Use your roofing square to lay out the rafters.
Cut the Rafters: Cut the rafters according to your design, ensuring the angles match the necessary pitch. The rafters form the main support structure, so precision is key.
Install the Ridge Board: The ridge board runs along the apex of the roof and connects the tops of your rafters. Make sure it is perfectly horizontal.
Attach the Rafters: Securely attach rafters to the ridge board and the top plate of your walls. Use reinforced metal connectors for added stability.
Install Collar Ties: These horizontal elements tie two opposing rafters together, adding strength.
Add Roof Sheathing: Once the frame is complete, cover it with sheathing, typically sheets of plywood, to form a base for roofing materials.
Weatherproofing: Finally, apply felt paper and shingles or another form of weatherproofing materials.
Embracing Financial and Educational Support
Embarking on a roofing project, whether for personal development or as part of a larger endeavor, can sometimes strain resources. Consider the following financial and educational support options to alleviate some pressure:
Government Home Improvement Grants: 🏠 Look into programs that provide financial aid for roofing and other home upgrades.
Educational Workshops: 🎓 Participate in local workshops or online courses to improve your carpentry skills.
Low-Interest Loans: 💸 Research financial institutions that offer loans specifically for home improvement projects.
Credit Card Solutions: 💳 Explore credit card options with 0% introductory rates for purchases, which can delay the financial hit of buying expensive materials.
Community Assistance Programs: 🔧 Many local governments offer help for home repairs, which can include roofing.
Completing a roof framing project is both an accomplishment in craftsmanship and an opportunity for learning and growth. With these tools, techniques, and financial resources at your disposal, you're well on your way to a secure and reliable roof overhead. Whether you aim to improve your own home or embark on a professional path in construction, consider leveraging these opportunities to enhance your skills and financial well-being.

